
In collaboration with LashBase
25th Jun 2026
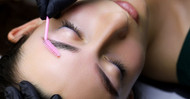
The ultimate guide to brow lamination with LashBase
Brow laminations continue to be one of the most requested brow treatments in salons, and it's easy to understand why. In less than an hour, clients can achieve fuller-looking, fluffier brows with improved symmetry and definition, all with minimal maintenance between appointments.
Suitable for a wide range of brow types, from naturally full brows to sparse or unruly hairs, brow lamination is a versatile treatment that can help clients to get their ideal brow shape. Whether your client prefers a soft, brushed-up finish or a more structured look, mastering your technique is key to delivering long-lasting, professional results.
This guide explains how to carry out a brow lamination treatment using LashBase Lifted. with cysteamine, with pro tips for achieving the best results, and covers essential aftercare advice to help clients maintain fuller-looking brows for longer.
What is brow lamination?
Brow lamination is a semi-permanent treatment designed to reposition or set brow hairs into a desired shape. By softening the hair structure and repositioning the hairs, brow lamination creates the appearance of fuller, smoother and more uniform brows.
While results can last up to six weeks, it's important to manage client expectations. A common misconception is that brows will remain perfectly styled for the entire treatment duration. In reality, clients will need to brush their brows into place regularly to maintain their preferred look.
How to carry out a brow lamination treatment
Before beginning brow treatments, always ensure your client has had a patch test in line with manufacturer guidelines.
Step 1: Cleanse the brows
Thoroughly cleanse the brow area to remove makeup, oils and impurities. Using pre-treatment cleansing pads or a suitable cleanser will help prepare the hairs for treatment and ensure optimal product penetration.
Once cleansed, gently pat the brows dry with a tissue.
Step 2: Position the brow hairs
Using a disposable applicator wand, apply a thin layer of adhesive to one brow at a time.
With a Y-comb or brow styling tool, carefully brush the hairs upwards and into the desired shape. Take your time during this stage, as the positioning of the hairs will significantly impact the final result.
Repeat on the opposite brow, ensuring both brows appear balanced and symmetrical.
Step 3: Apply the lifting solution
Dispense LashBase Lifted. Lift 1 with cysteamine onto a palette and use the LashBase Lifted. lift and tint brush small to apply a thin, even layer through the brow hairs.
Processing times will vary depending on the condition and texture of the client's natural brows. As a guide:
- Fine or delicate hairs: approximately 8 minutes
- Medium brow hairs: 8–10 minutes
- Coarse or resistant hairs: up to 10 minutes
Apply a strip of cling film over the brows once the lifting solution has been applied, and leave to process for the recommended development time. Using cling film helps to encourage product penetration and can enhance the effectiveness of the lifting solution, particularly on coarser brow hairs. Always follow the manufacturer's recommended processing times, and monitor the brows throughout development..
Step 4: Remove and apply the fixing solution
After the lifting solution has processed, gently remove all residue using a dry cotton pad.
Repeat the application process with the LashBase Lifted. fix 2 with cysteamine, ensuring the brow hairs remain in their desired position throughout.
Allow the fixing solution to process for approximately 5–7 minutes before removing thoroughly with a dry cotton pad.
Step 5: Tint the brows
If your client would like more brow definition, apply a brow tint and follow the manufacturer's recommended timings.
Once developed, remove any excess tint with damp cotton pads and gently pat the brows dry.
Step 6: Nourish and condition
Finish the treatment by brushing the LashBase Lifted. enrich 3 with cysteamine through the brows using a mascara wand.
Brush the hairs into their final shape, and advise your client to leave the nourishing product on for 12 hours to maximise hydration and support healthy-looking brows.
Pro tips for better brow lamination results
Assess the brows first during a consultation
Before beginning the treatment, assess the condition, density and texture of your client’s brow hair, and adjust the processing times accordingly. Over-processing can weaken the hair structure, while under-processing may prevent the hairs from setting effectively, so it’s important to conduct a thorough consultation for each new client.
Perfect the styling stage
The positioning stage is one of the most important parts of the treatment. Spend time carefully arranging the hairs into place before applying your solutions, as this will determine the overall finish.
Use cling film with caution
Cling film can be a useful tool for encouraging product penetration, particularly on coarse brow hairs. However, it increases processing speed, so close monitoring is essential to avoid over-processing.
Offer brow lamination aftercare advice
Providing thorough aftercare guidance helps clients maintain their brows correctly for longer-lasting results.
Advise clients to follow these key aftercare steps:
- Avoid getting the brows wet for the first 24 hours.
- Refrain from hot showers, swimming, saunas and steam rooms during this period.
- Do not touch, rub or excessively manipulate the brows for 24 hours.
- After the initial 24-hour period, brush the brows into place when damp to help maintain their fluffy appearance.
- Apply a conditioning serum or brow gel between appointments to nourish the hairs and keep them looking healthy.
With the correct aftercare, brow lamination results can last up to six weeks, although individual results will vary depending on lifestyle, skincare routines and hair growth cycles.
Elevate your brow services
Brow lamination remains one of the most profitable and versatile treatments for brow professionals. By tailoring your approach to each client’s natural brow shape and hair type, you can achieve beautiful, long-lasting results. Clear advice on expectations and aftercare also helps clients maintain their brows between appointments.
Looking to expand your treatment offering? Build your skills with the LashBase Lifted. brow lamination online training course. Shop our professional brow lamination products, brow tints and aftercare essentials to perfect every stage of your brow lamination service.
Shop brow lamination essentials
LashBase Lifted. pre-treatment cleansing pads
LashBase brow lamination brushes, 10 pack
LASHBASE lash lifting Y-comb
Beauty Essentials deluxe lash and brow comb 7"
LashBase Lifted. lift and tint brush small, flat
LashBase Lifted. lift and tint brush small, angled
LashBase lash and brow tinting palette, black
LashBase lift & tint dish, small, 5 pack
Beauty Essentials 100% cotton cosmetic face pads, 500 pack
LashBase Lifted. pre-treatment cleansing pads, 120 pack
LashBase brow lamination brushes, 10 pack
LASHBASE lash lifting Y-comb
Beauty Essentials deluxe lash and brow comb 7"
LashBase Lifted. lift and tint brush small, flat
LashBase Lifted. lift and tint brush small, angled
LashBase lash and brow tinting palette, black
LashBase lift & tint dish, small, 5 pack
Beauty Essentials 100% cotton cosmetic face pads, 500 pack